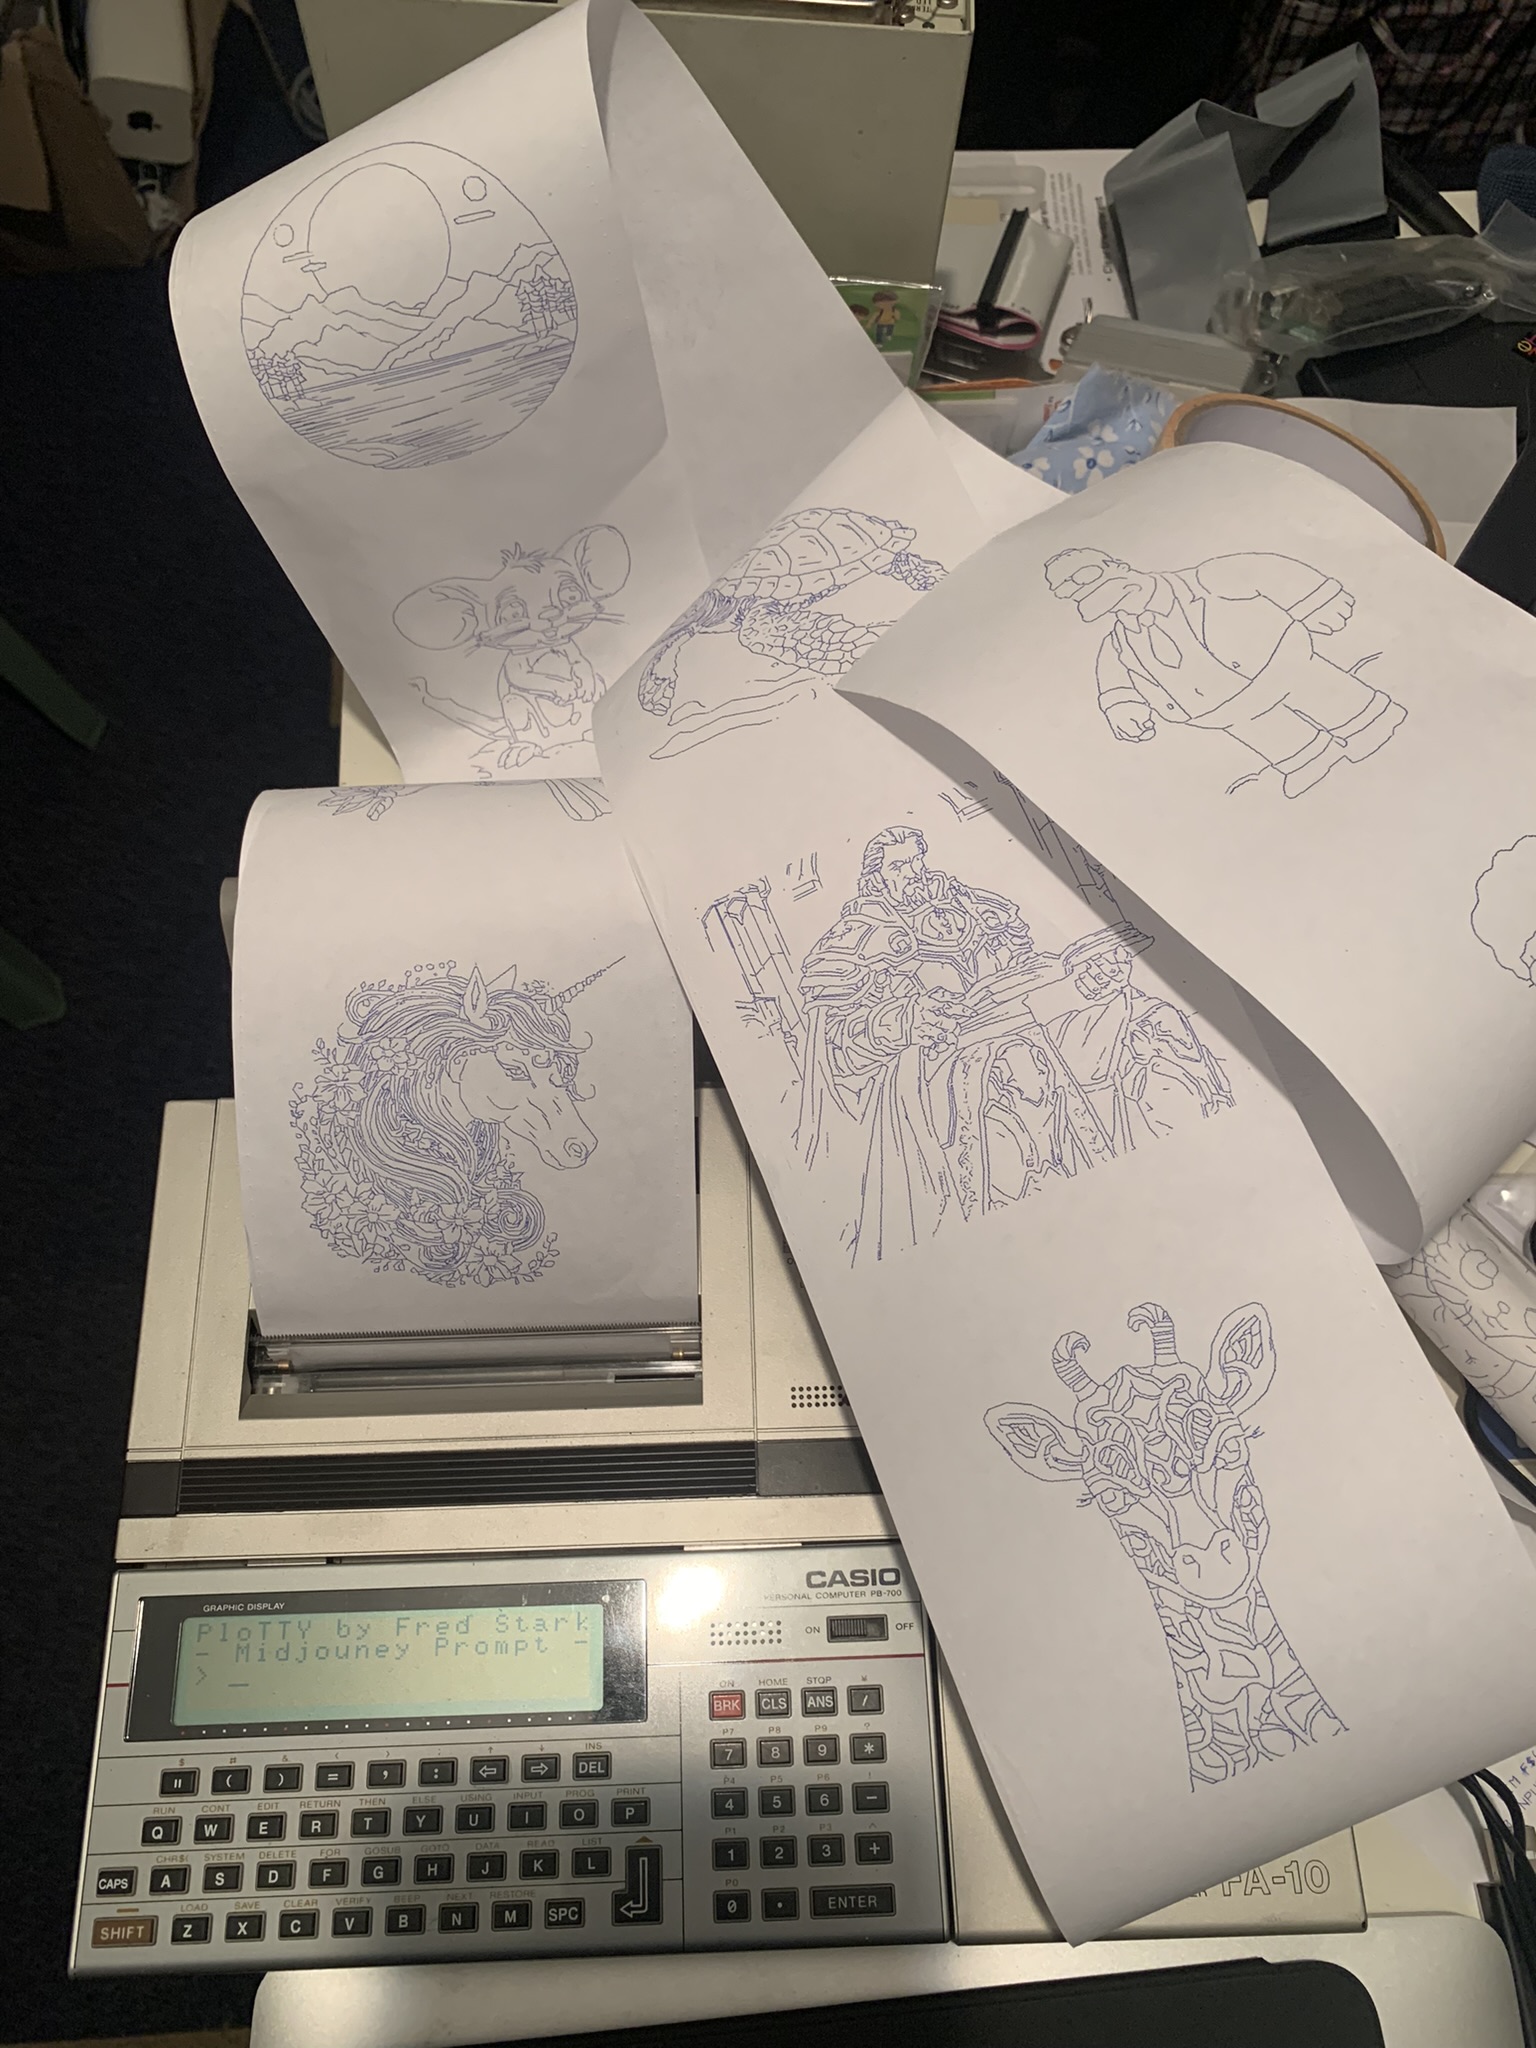
Midjourney on the cutest 40 year old laptop ever
The Pitch #
The Casion PB-700 with its CA-10 is my favorite computer.
It is a fascinating little device from 1983. It has a sleek 160x32 pixels screen, and a whoping 4Kb of RAM, extensible to 16K, using 3 modules made of unobtainium.
It has a companion printer, the FA-10, which is actually a 4 colors pen-plotter, found as an accessory for few machines of the era, like:
- The Atari 8 bits,
- The superb Canon X-07,
- The Commodores,
- As an accessory to the TRS-80
- Some versions of the Sharp MZ-700
And, in smaller versions in:
Unfortunately, mine isn't fully working, and I only managed to get one color, so PloTTY is a monochrome program.
Anyway, this thing is the cutest, in particular with its incredibly tiny associated tape recorder, the CM-1 (under the paper in the intro picture).
It is a shame that there are no real impressive demos of what that machine and plotter can do, and I needed to find something fun, interesting, modern and useless to do.
However, I can't draw, but I can code. And coding is done to make computer do what we can't, right?
What if I made a program where I can type what I want to draw and the PB-700 just draws it?
So, connecting the PB-700 to midjourney is the obvious idea. A linux box will do the midjourney request, some image manipulation and serve the result to the PB-700.
Thanks to a sugestion of @Altomare the name of the software will be PloTTY, to emphasis the fact that, althought it does plot drawings, it has nothing to do with TTYs.
Simple.
How do we communicate? #
There are a few hurdles to overcome. For instance, there is there is no serial or parallel port, so no outside communication possible with the PB-700. Or is it?
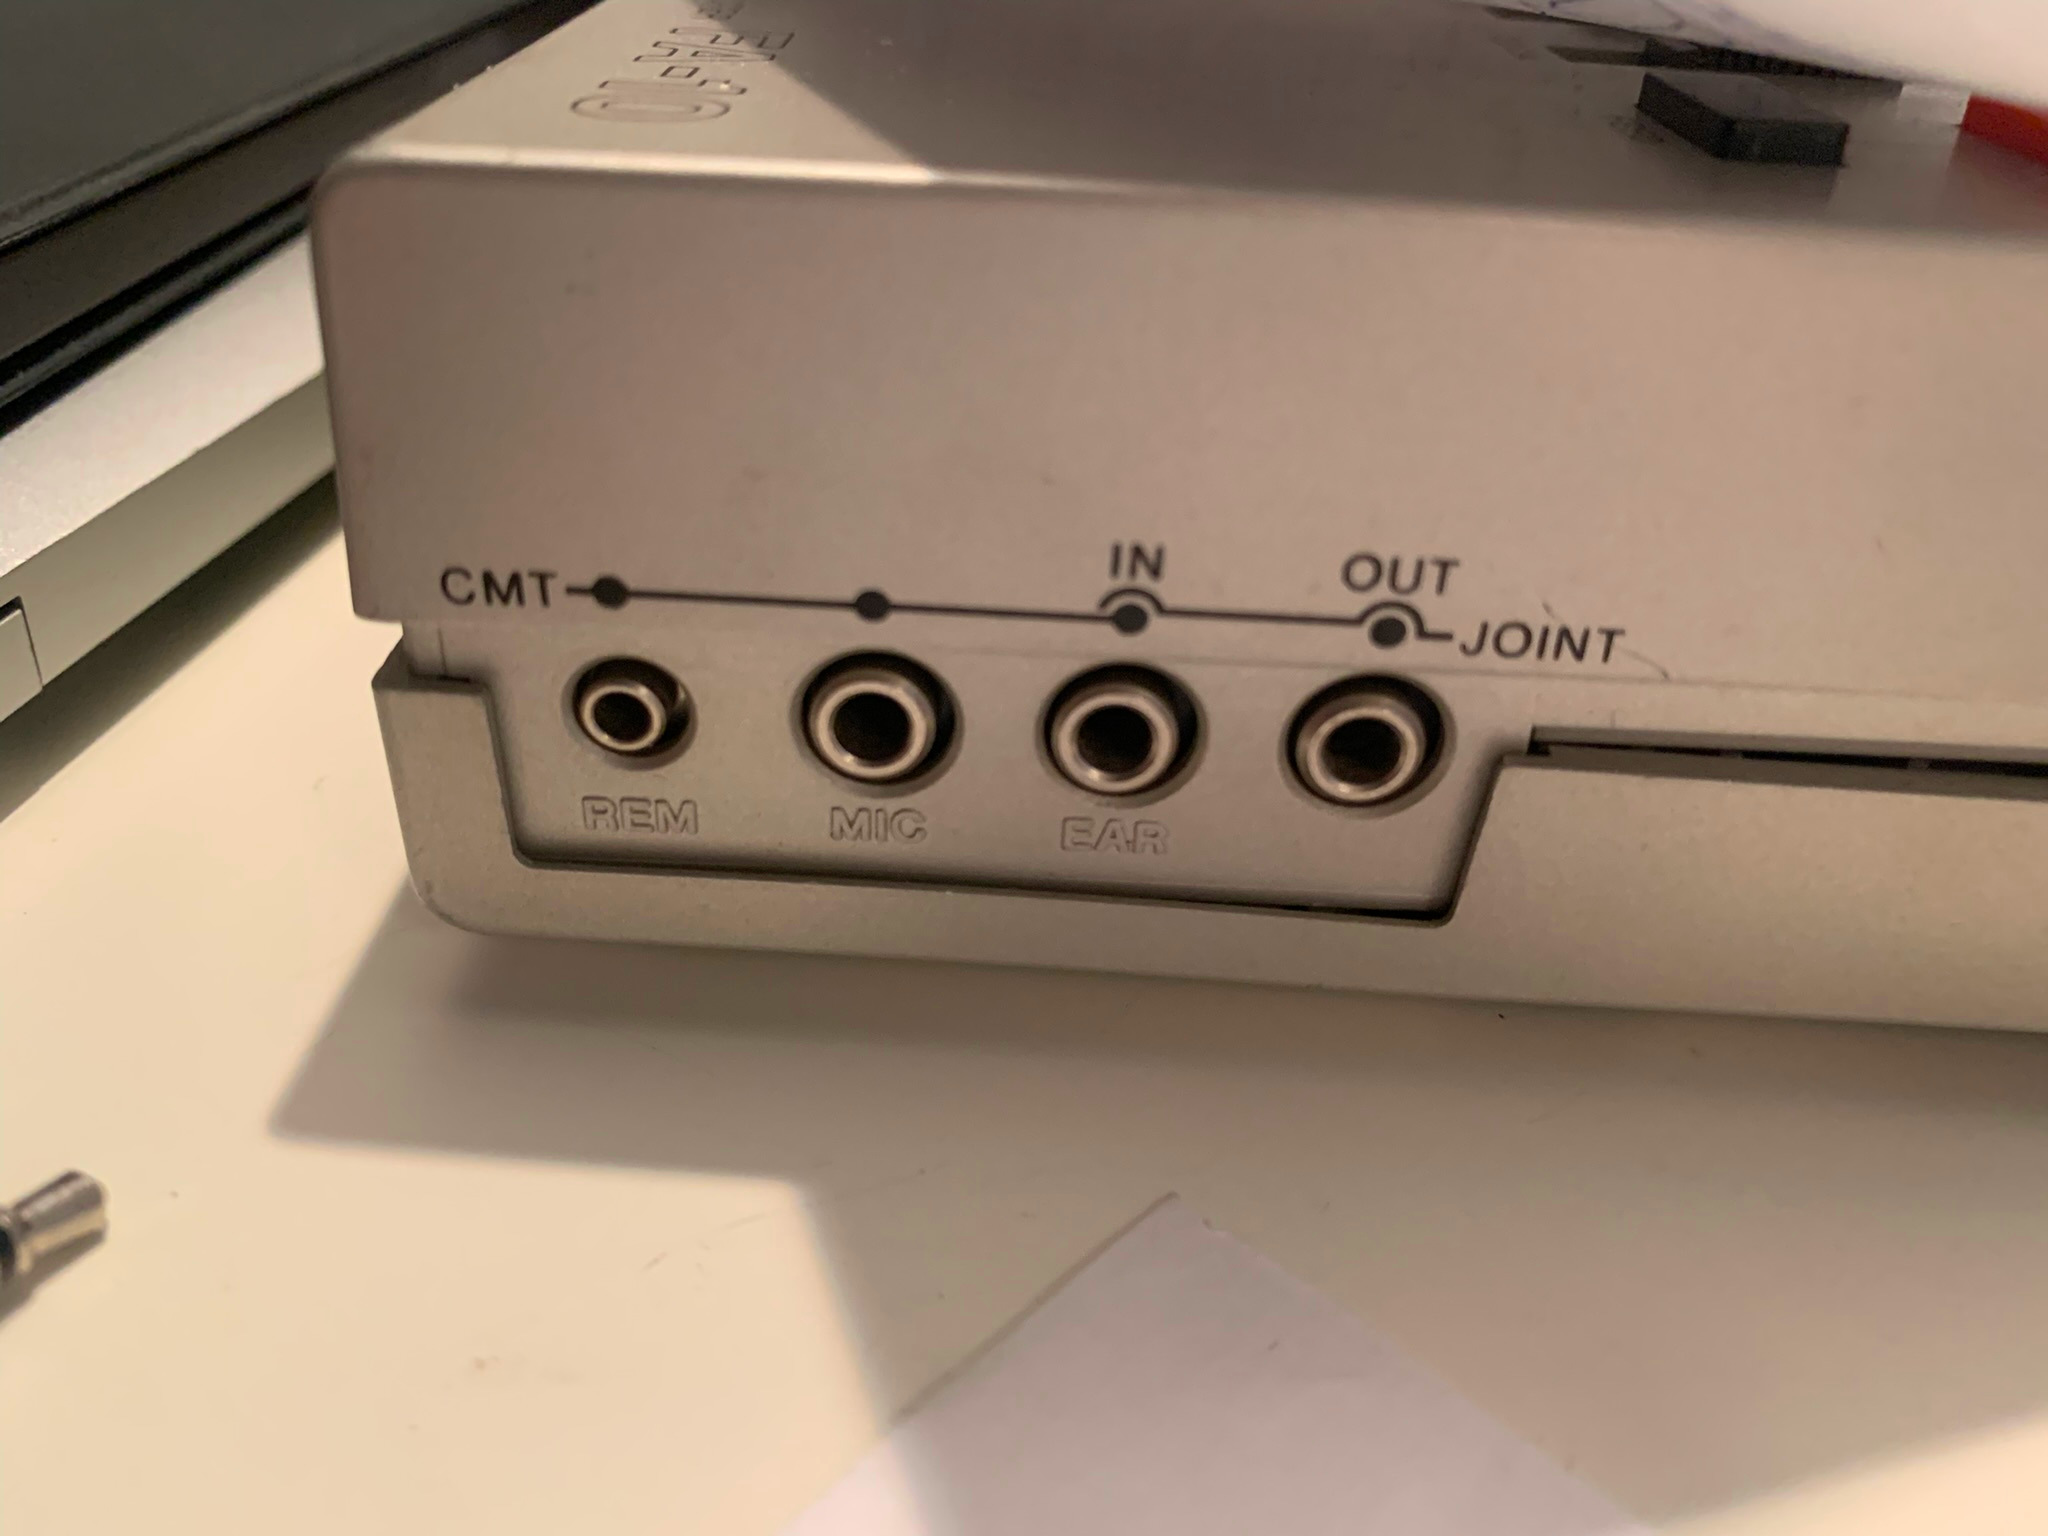
Well there are cassette ports. So, technically, we can communicate. We'll just need our Linux box to emulate a tape recorder. Problem solved.
High-level view of the process #
-
The PB-700 is connected to the Linux box with both the IN and OUT audio lines.
-
The user type
CHAINon the PB-700 to load and execute the basic program on tape. -
The linux server send the initial BASIC program and wait for an answer from the PB-700.
-
The PB-700 prompt the user for the image he wants, and writes its to the tape. It then executes another
CHAIN, waiting for the next BASIC program to execute. -
The linux server gets audio data as a wav file and use the
casutiltools to extract the information sent. -
This information is transformed into a midjourney prompt, for generating an image.
-
The resulting image is traced and a BASIC program that draws that image is generated and sent to the PB-700.
-
The PB-700 gets the basic program and plot the image.
-
As the BASIC programs ends up with another
CHAINcommand, the whole process is repeated
Easy, peasy.
Well, this is conceptually quite simple, but the implementation is riddled with unexpected roadblocks and the end architecture looks like:
Continue reading to find why...
On the PB-700 side #
There no assembly language on the PB-700, everything needs to be done in basic, no way to access to the underlying hardware (in modern-speak, the PB-700 have never been jailbreaked -- hint hint). Any signal sent to the cassette port needs to be done from within BASIC.
Fortunately, our needs are pretty limited: we need to send a short amount of data, and get back a "large" amount (large being defined as something like a few dozen KB).
Writing data to the cassette port can be done using the BASIC PUT command, that writes variables to the cassette. It is slow. First, because the cassette encoding is slow (300 bauds), but mostly because it writes a header, some metadata, another header, the data you want to write, and closes the communication with a trailer. Writing 20 bytes of data to the cassette takes around 12 seconds.
As we need to read large amount of data, I'm gonna directly load a BASIC program that draws the result. Fortunately, the PB-700 BASIC have the CHAIN command, that loads a program from tape and directly executes it. This is how our midjourney program will get a different program for each drawing. Or sets of programs, as a drawing may require more than one.
Here is the full source code of midjourney for PB-700:
1 DIM F$(1)*79
2 CLS
3 PRINT "PloTTY by Fred Stark";
4 PRINT "- Midjouney Prompt -";
5 INPUT "> ",F$(1)
6 INPUT "Variation (1-4): ",V$
7 F$(1) = F$(1)+"/"+V$
8 PRINT "Sending..."
9 PUT F$(1)
10 PRINT "Waiting for image..."
11 CHAIN
On the linux side #
The plotty.sh server #
On the linux box, we need some server software that just executes a succession of commands. Let's pretend that bash is perfect for that, and you can look at the full server code here to see the source code in its glory. The rest of this walktrhough is every steps of this server's implementation.
Sending BASIC to the PB-700 #
Casutil is a set of utilities to manipulate sound files for Casio pocket calulator, including the PB-700, written by Marcus von Cube. It also contains utilities to encode and decode basic programs.
So, the first order of business on the server is to send the plotty BASIC program:
echo "-- Generating plotty.bas binary file"
casutil/linux/bas850 -b -t7 pb-700/plotty.bas plotty.bin >> log.txt
echo "-- Creating plotty.wav"
casutil/linux/wave850 -b plotty.bin plotty.wav >> log.txt
echo "-- Sending plotty.wav to PB-700"
play plotty.wav
This converts the BASIC source code into a tokenized form suitable for the PB-700 (tokenized programs are smaller, so we gain a bit of time there), the generates a .wav file and plays it on the audio output. Hopefully the PB-700 is ready exacuting CHAIN and will load and execute plotty.bas.
The communication is a 300 baud one, with a header. The .bin is 224 bytes, and the total communication time is 12.712s
Waiting for a response #
The casutil commands work on .wav files, so I need to use the record command to get the sound from the PB-700. Unfortunately, there is no way to make it stops when the line turns to silence. Hence, I had to create my own command that waits for sound, and records until the sound stops.
A small python command listen.py had to be created for that, using the python pyaudio, audioop and wave modules. Thanks ChatGPT for writing half of the code there. Unfortunately, casutil needs 8 bit wav, and I wasn't able to make it output that, so a quick sox solved that issue:
# Listen and decode answer
echo "-- Plotty.wav sent, waiting for reply"
python pb-700/listen.py
sox recorded_audio.wav -r 44100 -c 1 -b 8 out.wav
casutil/linux/wav2raw -b out.wav out.bin
Decoding the response #
The PB-700 response is stored into a binary file. As there is no way to properly decode its content, a quick xxd was used to find the offset of the content and another python command extract-data.py was created to extract the user prompt.
def extract_ascii_string(filename):
    with open(filename, 'rb') as file:
        # Set the starting offset to 0x29
        file.seek(0x29)

        # Read bytes until the next occurrence of 0x0d
        ascii_bytes = bytearray()
        byte = file.read(1)
        while byte and byte != b'\x0d':
            ascii_bytes.append(byte[0])
            byte = file.read(1)

        # Convert the extracted bytes into an ASCII string
        ascii_string = ascii_bytes.decode('ascii')

    return ascii_string

print(extract_ascii_string("out.bin"))
We loop until the data contains something, because sometimes audio interferences may get the listen.py command to record garbage.
Storing the prompt #
As there is no way to ask MidJourney for a single image, there are always 4 variations created. The user can specify which variation he is interested in, and is encoded in the format "PROMPT/VARIATION" (to have a single variable sent from the PB-700 and keep the binary decoding simple). Small tip: using "0" as a variation will render the full image. Anyway, nothing that a quick sed can't fix:
VARIATION=`echo $PROMPT | sed -e 's/.*\/\([^\/\]*\)/\1/g'`
PROMPT=`echo $PROMPT | sed -e 's/\\/[0-9]*$//g'`
The MidJourney prompt #
MidJourney generates images that are not generally suitable for tracing. Howver, by asking him nicely, we can get stuff that is pretty close. Here is the output of:
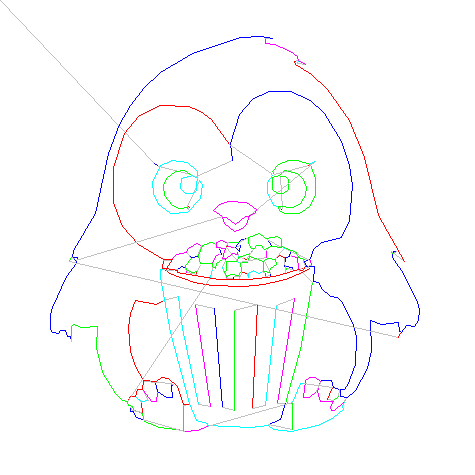
/imagine PENGUIN FROM PENGUINDRUM black and white line art constant thickness simple children coloring book:

So, it is just a matter of adding " black and white line art constant thickness simple children coloring book" to the PB-700 acquired prompt and sending this to MidJourney to imagine. Sure, the resulting "children coloring book" images have a tendency to contain a lot of cute flowerly imagery, but I'll say it is a plus.
Sounds easy, right?
Calling MidJourney #
Well, it would be pretty simple if midjourney had an API. But it is 2023, and not even multi-billion valuation startups are able to implement simple REST APIs.
MidJourney only API is Discord. You have to enter the command in a discord channel for MidJourney to answer. If this sounds surreal, read this again.
So, sure, it is easy, there is an API to send messages to discord channels, right? Right?
Well, not exactly. The only thing you can do is create a bot to ask a question in a channel. So I have to create a private discord channel and use a bot to tell MidJourney to generate an image.
So I did just that.
And of course it doesn't work.
You see, there are companies out there whose only business model is to provide a sane API to midjourney. For $40 a month.
Because, well, the MidJourney bot will not reply to requests sent by bots.
Some people just hacked and used the underlying Discord JSON API, but this isn't allowed by Discord's Terms Of Services, and can lead to termination of accounts.
Here I present you my solution, the mighty midjourney/sendrequest.sh shell script. You're free to wrap it into a REST API and sell it $39 a month.
#!/bin/bash

WINDOW_ID=`xdotool search --name "#general | Midjourney Discord"`

xdotool windowactivate $WINDOW_ID
xdotool mousemove --window $WINDOW_ID 400 1450
xdotool click 1
xdotool type --delay 10 "/imagine"
sleep 1
xdotool type --delay 10 " "
sleep 1
xdotool type --delay 10 "$1 black and white line art constant thickness simple children coloring book"
sleep 1
xdotool type "$(echo -ne '\r')"
Yes, this uses X11 to simulate user input in a running Discord client. I need to have to get the discord client on the right channel, or I span random conversations with /imagine commands. And the window have to be full screen height. And there are delays because sometimes Discord needs the user to pause after the /imagine or it will not recognize it as a command. And that pause needs to be long enough, because there seems to be some random network calls at this moment.
Anyway, as kuldgy as it looks, this will get MidJourney to generate out drawing.
In the Discord channel...
Retrieving the image #
Retrieving the image was not too difficult, using bits of the failed code of the previous section: I have a Discord bot that connects to a channel and downloads the latest image generated. It is built by trial and errors, and you can find it in the github.

Fundamentally, the bot in itself is pretty simple, configuring its access on the Discord website was an exercice in frustration, but it obiously just connects to the channel 1129449736882114674, recovers the last message and saves it in a local file.
Note: the bot's token is stored in the non-commited file midjourney/midjourney-bot-token.
Oh, and don't enter anything that the AI would find sucpicious. A prompt of "PHILIP K DICK black and white line art constant thickness simple children coloring book" would not trigger the image capture bot, because, you know, DICK, and MidJourney will then decide to respond with a private message, which obviously will get lost. So be it.
Anyway, at the end, I got this running.
Tracing the image #
When I started the project, I naively thought it would be the hardest part. It definitely wasn't.
The heart of it is a python script, called trace.py
I'll do a separate blog post to go through the process, but fundamentally, it takes an image, a corner to extract (because MidJouney insists in generating 4 images), and generates a JSON with coordinates list.

The output of the script:
[[[30.8, 62.4], [31.0, 62.4]],
 [[32.2, 62.4], [31.2, 62.2], [31.2, 61.0], [30.8, 61.0], [30.8, 60.0], [30.4, 60.0], [30.8, 59.2], [31.4, 60.8], [33.2, 62.2], [32.2, 62.6]],
 [[33.6, 63.0], [33.2, 63.0], [33.2, 62.4], [33.8, 62.4]],
 [[34.6, 62.8], [33.8, 62.6], [33.8, 63.2], [37.4, 62.6], [39.4, 60.8], [39.6, 59.6], [40.2, 59.2], [40.2, 55.8], [39.0, 53.6], [38.0, 53.4], [37.0, 52.4], [34.0, 52.4], [33.2, 52.8], [31.0, 55.2], [30.4, 57.4], [30.8, 59.0], [30.4, 58.8]],
 [[38.4, 59.8], [36.8, 59.8], [36.2, 59.2], [36.0, 57.6], [36.6, 56.8], [38.8, 56.8], [39.2, 59.2]],
a little more than a hundred lines skipped
 [[64.4, 18.8], [64.0, 18.2], [63.6, 18.8]],
 [[63.8, 18.0], [63.4, 17.0]],
 [[79.6, 27.6], [79.6, 27.8]],
 [[14.8, 43.2]],
 [[13.8, 43.2], [13.8, 42.8]]]
Generating the BASIC program #
Those coordinates can then be turned into a basic program for the PB-700 by the json2basic.py python script
1CLS:PRINT"Lines 1-93/93"
2LPRINT CHR$(28);CHR$(37):LPRINT"O0,-96"
3LPRINT"D30.8,62.4,31.6,61.8"
4LPRINT"D38.0,60.2,36.8,61.0,35.0,60.8,33.4,59.6,32.6,58.0,32.8,56.0"
5LPRINT"D32.8,56.0,34.4,54.0,35.8,53.4,37.4,53.6,37.6,53.2"
6LPRINT"D37.8,53.6,37.4,53.8"
7LPRINT"D39.8,59.0,40.4,58.2,40.0,55.4,37.4,52.6,34.0,52.4,31.6,54.2"
8LPRINT"D31.6,54.2,30.6,56.4,30.4,58.6,32.0,62.0,34.4,63.0,37.4,62.6"
9LPRINT"D37.4,62.6,39.4,60.8,39.2,57.0,38.4,56.4,37.0,56.4,36.0,57.4"
10LPRINT"D36.0,57.4,36.2,59.4,38.4,60.0,39.4,59.4"
and a lot of lines, until
135LPRINT"D44.8,50.4,46.8,48.8,48.4,49.4,49.2,50.2,49.8,52.0,51.0,52.6"
136LPRINT"D51.0,52.6,51.2,53.2,49.2,54.6,45.6,54.8,43.8,54.2,42.6,53.0"
137LPRINT"D42.6,53.0,44.4,51.8"
138LPRINT"D15.0,43.0,14.8,43.4"
139LPRINT"D14.2,43.6,13.8,42.8"
140LPRINT"D79.6,27.6,80.0,28.4"
997LPRINT"M0,-20"
998PRINT"--Finished --":A$="NEXT":PUTA$
999PRINT"Loading PloTTY...":CHAIN
The code is straightforward: LPRINT CHR$(28);CHR$(37) puts the plotter in graphic mode. LPRINT"O0,-96" sets the origin to around 9.6 centimeters below the current plotter head. LPRINT"D30.8,62.4,31.6,61.8" draws a line from 30.8,62.4 to 21.6,61.8. The 80's were a much simpler time...
Also, the programs ends up by PUTing the string "NEXT" back to the Linux and then executing a CHAIN command, passing the control to the next BASIC program sent by the Linux host.
If the image is too large for my PB-700 (which has 12K of RAM! Yes, I have 2 OR-4 4K extensions!), then it will generate a set of programs, which will automatically chain into each other.
In the plotty.sh shell script, there is a --size 8000 parameter to the invokation. This will limit the size of the generated programs so they easily fit into a 12KB PB-700. It can be made smaller to target a machine with 4KB of ram, or larger for the mythical fully loaded PB-700.
echo -n "-- Generating BASIC programs:"
python pb-700/json2basic.py --size 8000 < prog.json
Sending the program to the PB-700 for execution #
The overall plotty.sh shell script will then transform each of those BASIC programs into a tokenized form for the PB-700 BASIC, generate a .wav file, and send it to the PB-700, which has been waiting all this time.
echo "-- Transforming [$f] into binary"
casutil/linux/bas850 -b -t7 "$f" prog.bin >> log.txt
echo "-- Generating wav for [$f]"
casutil/linux/wave850 -b prog.bin prog.wav >> log.txt
echo "-- Sending [$f] to PB-700"
play prog.wav
Sending the program takes around 5 to 6 minutes. A breeze!
During all this time, the PB-700 has been waiting in its CHAIN command. It will load the program and execute it, finally executing the drawing on the FA-10.
Oh, and make sure you have disabled the notifications from your discord client, because if anything happens, the notification sound will helpfully get mixed in the data and sent to the PB-700, breaking the whole process. Lovely.

At the end of the program, the PB-700 will PUT the string "NEXT". The plotty.sh shell script will read it and know that the PB-700 is ready to CHAIN into another program. It will then send either the next part of the drawing, or go back to sending the orginal plotty.bas program, letting the user select a new drawing.
How do I run it myself? #
Well, if you have the PB-700 and the CM-1, a linux host and two audio cables, you can head to the repository. You will also need a link to the casutils commands at the top of plotty.sh working directory, and an install of sox.
There is a caching mecanism in the plotty.sh shell script, and any prompt that have a matching JPG image in the cache directory will skip the whole discord/midjourney process. Quite a few are provided in the github, so you can easily invoke Cthulhu, Darth Vador or Mickey Mouse.
And typing CAT, variation 1 on your PB-700, will always produce the following cat image:

If you want to get the real midjourney connection working, you'll need a paying midjourney account, you'll need to change the midjourney/sendrequest.sh code to type into the right window, and you'll need to set a discord bot (store the token in the file midjourney/midjourney-bot-token) and probably change the channel number from 1129449736882114674 in midjourney/midjourney-bot.py...
Conclusion #
That was a fun ride, and I finally got my plotter to generate interesting images. It is a bit sad to see the state of modern computing and the pile of hack that are needed to integrate properly with midjourney. The whole thing is very fragile, and dependent on the behavior of Discord and MidJourney, both from a technical standpoint, and a functional one. I can guarante that, in 40 years, nor Discord nor MidJourney will still be here, nor that such prompt will still generate a suitable image. It will break way sooner. But my trusty PB-700 will continue chugging beautiful images on its cute printer, and that all that matters.
Links #
The github repository will all the code and sample images
As there is no Wikipedia page for the PB-700 (what a shame), here are a few links:
The Casio PB-700 specifications
The oh-so-cute CM-1 Tape recorder